<img alt="" src="https://secure.365-visionary-insightful.com/791573.png" style="display:none;">
2024 Summer

Optimise your TrekkSoft booking system

We're putting together a series of recommendations for TrekkSoft users to get their websites ready for bookings! From setting up your account and testing it, to running simple marketing campaigns, we'll cover everything you can do to get convert as many browsers to bookers as possible.

Don't forget to bookmark this page so that you can return to it any time!

Tip 1: Test your TrekkSoft booking system

To start, we'll look at the most crucial part of your website - your booking flow. What do your customers see when they land on your tour or activity page? Do you have the correct dates and times listed for your activities? Are there missing details that need to be added? Do the automated confirmation emails work? We'll show you how to run a test booking to find out.

The booking test consists of two parts:

Part 1: Make a booking just like how your customer would

Part 2: Check that your backend TrekkSoft setup works correctly


Part 1: Make a booking just like how your customer would

To start, you'll need to create a discount code to run the test booking. Go to Promotion > Discount Codes and Gift Codes. Then, create a discount code and name it “TEST”, and set the maximum number of uses to 10 times with a discount of 100%. When this is done, log out from your TrekkSoft account and head over to your website to make a booking.

As you go through your website, look out for the following:

Activity listing on your website
  • Is your activity or tour title clear?
  • Have you added high quality images that represent the experience you want to deliver?
  • Have you added enough detail to your tour and activity descriptions? Will customers understand the experience you're offering?

Check out these pages for more tips and how-tos:

Schedule and pricing
  • Is the correct schedule displayed in the calendar?
  • If there are multiple start times on the same day, is this clearly displayed on your website?
  • If there are variations of an activity starting at the same time, will these options be clear to your website visitors?
  • Are your prices listed correctly for different price categories?
  • If there are multiple price categories per tour or activity, are the descriptions clear for each price category?

Check out these pages for more tips and how-tos:

Booking flow and checkout

Once you've gone through your website, head over to your “Book Now” button to make a test booking. Select multiple tickets to get started. When it comes to payment, use the TEST discount code we created earlier. Also, make sure to use a valid email address to test automated emails and tickets.

Throughout the booking process, make note of the following:

  • Was the price for multiple tickets calculated correctly?
  • Did the right Add-ons show up for this activity? Are any Add-ons missing?
  • Have you set up your Guest Custom Fields to capture enough information? Do you need to remove or add more fields? You should only collect necessary information in the booking flow and ask the remaining items after the booking has been completed. For instance, if guests need to be over 18, you can ask for their age during the booking process and only ask for their shoe size or helmet size after they've completed the booking.
  • Does everyone on the tour need to submit their information, or do you simply need the contact information of one person?
  • If you've set up Taxes and Fees, are these being displayed and calculated correctly?
  • Are your terms of service and cancellation policies displayed at checkout?
  • If you have additional questions to ask after payment, did these questions show up after you've completed your booking?

Check out these pages for more tips and how-tos:

Check your inbox after you've completed your booking

Did you receive all the automated confirmation emails and tickets previously set up?

  • Did your emails address the customer? Did the personalization tokens appear correctly?
  • Did the right date and time show up in the emails and tickets?
  • Did the confirmation email contain tickets for all booked guests?
  • Was the correct ticket template used?
  • If you've created PDFs to be attached to the confirmation emails, did these get sent out too?

Check out these pages for more tips and how-tos:

Part 2: Check that your backend TrekkSoft setup works correctly

With your test bookings done, log back into your TrekkSoft account to check on the following items:

Dashboard and Overviews
  • Did the new test bookings appear in your Dashboard?
  • Did they also come up in your Manifests and Trip List?
  • If the activity requires resources, were the relevant resources allocated to that booking?
  • If you set up Google Calendar notifications or email notifications, did these show up as well?
Guest Manifest

Now, go to your Guest Manifestby clicking on Schedule and Manifests in the left-hand menu. Then, select Calendar View and click on the TEST booking.

  • Do you see all the guest information you asked for?
  • Are the custom fields displayed correctly?
  • Try exporting your Guest Manifest, does it work? Did all the information you need to export seamlessly?
Basket Details

Next, head over to Basket Details.

  • Did all the details for that booking appear correctly?

Then, rebook the customer for the same activity, but on a different day.

  • After rebooking the customer, did these changes show in Basket Summary?
  • Next, try resending the receipt to the email address.

Lastly,cancel the booking.

  • View your Basket Summary once again — did the changes show up?

Check out these pages for more tips and how-tos:

Tip 2: Optimize your website for conversions

This week, we analyse your website and the various ways to improve your website's conversion rates. Before we jump into the “how-tos”, let's take a second to understand conversion rates and why it's important.

Conversion rate optimization is a systematic way of getting website visitors to take the “right next step”, whether that's signing up for a newsletter, downloading a brochure, or booking a tour.

For example, if your Bike Tour booking page gets 100 visitors and 20 of them book a tour in that same session, your conversion rate for that page is 20%.

To improve your website's performance, we'll optimize key website pages so that more website visitors take the “right next step”, bringing them closer to making a booking.

1. Value proposition

What are you offering website visitors, and what are the overall costs and benefits of taking action?

For example, if you want to build your mailing list and are offering a free guide of your city in exchange for an email address, is it clear that the information offered in your guide is worth the trouble of filling out a quick form?

If you want to improve the conversion rates on your booking pages, what value are you offering websites visitors who book a trip with you? Is this value highlighted on your booking page?

Here's some additional information you can add to your booking pages:

  • Inclusions and exclusions — What's included and excluded from the tour price
  • Itinerary for the tour or activity
  • Introduce your guides, make it personal
  • Social proof — Add customer photos and customer reviews to give users a glimpse into the experience you offer

Here's an example of how Sandemans NEW Europe shows off their tours

2. Relevance

On the topic of relevance, there are a few things we should ask ourselves:

  • Does the content on this page relate to the value proposition?
  • Is the content on this page relatable to the target audience?
  • Are you displaying content that visitors expect to see?

If we take the example of your booking page for a bike tour, are you showing content that helps website visitors understand what you offer and is your page relatable to your target customers?

3. Clarity

Is your value proposition clear on this page? Have you clearly outlined your call-to-action (CTA) or the “right next step”?

When it comes to content, are you making it clear in writing what the next step should be? If it's to sign up for a newsletter, try something as simple as “Want more adventure stories? Sign up for our newsletter”.

If you're trying to get more people to book a tour with you, adding “Book your next adventure with us” could be a good first step. This could be added to the body of your text, or above or next to your CTA button to compliment it.

In terms of design, are your calls-to-action clearly depicted on your page? Here are some basics to follow:

  • Place your CTA above the fold (that's the part of the page that is visible before users scroll down).
  • Does your CTA text tell users what happens if users click on it? For example, if someone should sign up for a newsletter, the CTA button should say “Sign up” or “Join newsletter”. Similarly, the text on a CTA button that kickstarts the booking process should say “Book Now” or “Start booking”.
  • Does your CTA button stand out? Using contrasting colours in your CTA draws the attention of website visitors, which helps to highlight the next right step.

For more in-depth writing about designing the best CTA for your website, check out this blog post.

4. Anxiety

Could there be elements on your page that create uncertainty or doubt in your customers' minds? Or perhaps some information is missing? This is especially important to consider if you offer adventure or outdoor experiences that require specific health and safety measures.

In his webinar, Tim Warren shared about Defining/Credibility Statements, which are statements that communicate experience, quality, safety and social proof. An effective Defining/Credibility Statement quickly establishes trust and can help to reduce anxiety and uncertainty.

Creating your own credibility statement is easy, simply highlight the number of years you've been in business plus the number of guests you've served over the years. Here are some examples Tim shared:

“Over 20 Years & 3,000 Happy Guests”

“Over 3,000 Happy Guests Since 1999”

“Celebrating 30 Years & 1000s of Happy Eco-Adventure Travelers”

Apart from adding a Defining/Credibility Statement to your website, you should also consider the following items:

  • Improve the quality of your website — Slow loading websites with outdated or cluttered designs and stock photos can give the impression that your tours are not as good as you say they are. If you have time, improve your website with these 11 tips to build a great tour operator website.
  • That customers have a great time when they book with you! — You could add reviews, testimonials, and even photos from previous customers.
5. Distraction

Are there elements on your page that distract users from its main purpose? Do you have any conflicting elements?

To reduce distraction, keep the text on your page concise and focused on the main message. Break down large chunks of text into shorter paragraphs or use bullet points so that your content is easy to read.

Design-wise, reduce visual clutter and remove unnecessary elements. On your important booking pages, do you best to reduce the number of ways that users can leave that page. A good start is to reduce the number of hyperlinks direct users off that page.

Here's a good example of how marketing experts optimise a landing page to reduce distraction >>

6. Urgency

You should give your visitors an incentive to take action NOW.

Running promotions, campaigns, or offering seasonal experiences can generate urgency. Adding phrases like “Spots sell out fast” or “Limited seats available” can also generate a sense of urgency in your copy.

You can also add TrekkSoft's Floating Cart to your website, where a 15-minute timer starts running as soon as website users add tours or activities to their basket. Here's an example of what the floating cart looks like:

Floating cart - NHUE - Barcelona

We'll explore more ways to create urgency in Week 4 when we discuss marketing campaigns.

Tip 3: Optimise your booking flow and upsell customers to increase booking value

This week, we'll work on optimising your booking flow and adding upsells at checkout to increase booking value. Let's get cracking!

Tips to optimise your booking flow

Your booking flow starts the moment someone spots your "Book Now" button, clicks on it and carries on to complete payment for your tours. By optimising your booking flow, you ensure that users go through the entire booking process, that they do not get bored or frustrated or distracted, and end the booking process prematurely.

While TrekkSoft offers a standard booking flow to all users, there are certain elements you can tweak to improve the user experience of your site.

1. Placement of your "Book Now" button

First and foremost, you should make it extremely easy for users to begin their booking process. Placing your "Book Now" button above the fold and using a contrasting colour make it more noticeable to your users, and they know exactly what to click on to start booking an experience with you.

We also recommend adding a booking button to the bottom of your page, after you've given users some time to read and learn about the tours or activities you offer.

One last thing about your booking buttons - Don't forget to add them to all your booking pages!

Shepton Mallet Prison's website is a good example of this. It is a heritage tour site run by The Campbell Group in the UK.

2. Use the right integration type for each webpage

TrekkSoft offers more than 10 ways to integrate the booking button to your website. Let's quickly run through some of them and where it's appropriate to use which booking button.

  • Activity booking: This integration is perfect for your booking pages*. Select the relevant activity and let users view your activity calendar and start the booking process the moment they click on the booking button.
  • Activity details: To show descriptions, routes, and images before kickstarting the booking process, you should use this integration. This can be used on the homepage or product category pages.
  • Activity finder: This integration is useful if you would like to list all the tours available and allow users to find the perfect tour based on the date and departure city. This can be used on your homepage.
  • Activity collection: Curate a collection of activities and use this integration to display your curated list. It's perfect for product category pages like "Land Tours" or "Winter Tours".
  • Package booking: You can offer packages which are a group of tours or activities that can be booked together. Since this integration leads users straight to the booking calendar, it's best to add this to the specific booking page of that specific package.
  • Package details: To show all the information about your packages such as tour details and departure cities, you can use this booking button. It would make sense to have this on pages where you don't have the package information already added, for example your homepage or product category pages.
  • Floating cart: The floating cart is automatically added to pages that have the booking button in place. For the floating cart to work on other pages without booking buttons, a special line of code needs to be added to the header or footer of the page. Pages like “About Us” or “Contact Us” should have the Floating Cart's code added.

We've also just released the iFrame and Fancybox integration for Booking Widget 3.0. Reach out to the Support Team if you would like help to add this to your website.

*Your booking page is also known as your product page. This is where you add all the information about a tour or activity you offer, including the itinerary, product description, pictures, user reviews, refunds policies and so on.

3. Choose the right way to kickstart your booking process

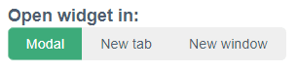
When setting up your booking widget, you have three options - to have the booking flow appear in a pop-up (or Modal), in a New Tab or in a New Window.

In general, we recommend that tour and activity operators choose the Modal option so that your users don't have to leave the product page or website when making a booking. With our Floating Cart feature, users can also continue shopping after they've added the product into their basket, further increasing basket value.

4. Check that your translations are complete

Operators who have translated their website content should check that their activities, schedules, pricing, and automated confirmation emails and tickets have been translated in full. It is not uncommon for us to find incomplete translations, which can distract customers from booking with you.

5. Make sure you have uploaded your logos

To ensure that your branding is consistent throughout the booking process, remember to upload your company's logo so that it is displayed during the booking and payment process. Otherwise, TrekkSoft's logo will be displayed instead.

6. Review your form fields

Go through your booking flow once more and review your Guest Custom Fields (aka the questions you're asking users before they complete the booking process). Are you only asking the necessary questions for you to process the booking?

Remember that you can always get additional information after completing the booking and payment.

Girl on bike tour

Upselling customers with Add-ons to increase booking value

Upselling customers can be as simple as adding a food option to a full-day tour or a photo package to a skydiving experience. Hotels and airlines have been doing this for years (think about the travel insurance they try to sell you at the end of every booking flow) and they keep doing it because it's a great way to increase booking value.

What should you offer your customers?

To come up with an attractive offer, consider your target customer and what they're most likely going to ask for before, during or after the tour. Do they ask if you provide pick-up services before the trip? Do they ask if lunch is included?

For example, if your tours mostly cater to young families, could you offer a Kiddie Snack Pack or a healthy family picnic basket as an Add-on? Perhaps you attract a lot of bachelorette groups, what about offering a bottle of champagne and some party favours? Maybe you offer a bike tour and could offer an additional bike rental as well?

Whatever you end up offering, make sure it's so valuable that your customers can't resist.

When to upsell?
  • Before the booking process starts.
    We recommended that you mention the different Add-ons offered on your product pages so that customers have a clear idea of what you offer right from the start.
  • During the booking process.
    TrekkSoft offers an Add-on feature where you're able to upsell your customers in the booking flow itself.
  • After the booking process.
    You can mention Add-ons in your booking confirmation emails or follow-up emails leading up the tour too!
Get started

With TrekkSoft, you can create three types of Add-ons:

  1. Single Item Add-on — This is used when items can be purchased in specific quantities, for example two hoodies or one mug.
  2. Add-on Type Guest — This is for services or items that can be bought per guest, for example travel insurance or a lunch add-on needs to be purchased for each guest.
  3. Gift Cards — Create Gift Cards and sell them as Add-ons in the booking flow.

Learn how to create Add-ons and add them to your booking flow here >>

Tip 4: Run a simple marketing campaign

Welcome back to Week 4! Today, I'll share how you can run a simple but effective marketing campaign to drive sales and bookings for the upcoming season.

What can you offer?

Discount codes

Discount codes can be a good way to generate interest in your experiences and boost sales. It's common these days for e-commerce stores to offer 10% or 15% off when someone joins their mailing list, or when they make their first order. Some stores even offer another 15% after the first purchase to encourage repeat purchases.

Operators can adopt a similar approach to encourage sales. Offering a discount of 15% to 20% for a direct booking on your website could provide enough incentive to get people to book with you. Remember that a direct booking saves you any commissions you would pay via a marketplace, and gives your customer a more direct experience with your brand.

With TrekkSoft, you can create discount codes that offer customers a percentage discount on their total purchase, for a particular product, or for a specific schedule.

Here are some scenarios that would best fit each discount type:

  • Flash sale — Offer a standard discount rate across your entire product line, but limit the timeframe for which it can be redeemed. In this scenario, create a discount code with a unique and memorable Code like “Summer 2024”, for example, and set an expiration date that fits your strategy. Alternatively, you can also limit the number of redemptions (e.g. first 100 bookings) to generate more interest.
  • Get more bookings during quiet times — If you notice a particularly quiet time in the day or week, it's a good idea to promote those time slots. In your discount code settings, scroll to “Limit to:” and select “Schedules”. Select the schedules you would like to offer a discount for.
  • Promote low cost, high return experiences — If you notice that your margins are higher for specific products, even after offering a discount, you should consider creating vouchers to promote these tours. In your discount code settings, scroll to “Limit to:” and select “Activities”. Select the activities you would like to offer a discount for.
  • Increase basket value — You can encourage customers to book more than one experience with you by offering Multi-discounts. The idea is that the discounts get higher as customers add more tours to their basket. Some calculations need to be done beforehand to determine the best rate to offer on your site. Check out this support article if you'd like to set up Multi-discounts for your products.

One last piece of advice on discount codes: Unless it's a flash sale,do not offer your most popular tours at a discount. If anything, consider pricing these experiences a little higher.

Check out these articles for more information:

Open tickets (also known as Voucher schedules)

Given that the market is still recovering, offering open tickets are a good way to secure additional cash flow until travel fully recovers. On top of that, your customers get to lock in their purchases at an attractive rate.

Barcelona-based company Cat Helicopters did this last year and saw positive results. Allowing customers to book now without pre-defined dates and scheduling their tours at a later date was a great way to reduce anxiety about whether they could actually go on the trip.

When creating open tickets like this, we recommend offering customers a 2-year redemption period.

Gift Cards

Similar to open tickets or voucher schedule, you can also offer Gift Cards that are redeemable for any of your tours. Instead of just selling yet another gift card, you could also offer €50 for €45 for instance. This could be a great gift for people to buy for their loved ones, especially over the holiday season.

Note that if you operate in Ireland, you are required by law to offer a 5-year redemption period. Please check your local regulations to ensure you comply.

disruptivo-iQ15DTx-63k-unsplash

Promoting your offer

Deciding what you want to offer is just one part of your marketing campaign. The other part involves promoting and distributing your offer through the right channels so that it reaches the right people.

Here are the various ways you can promote your offer. I recommend picking a combination of two to three ways, on top of promoting your campaign on your website.

Your website

Your website is your number one sales tool. If you're running a special campaign, make sure to update your homepage, create a unique landing page that explains this offer, and consider adding a pop-up to high traffic pages to capture users' attention.

Here's what to do:

  • Homepage — Add a banner or pop-up to the top of your website, or update the hero image (that's the oversized header image on your homepage) to announce your limited time offer
  • Unique landing page — Create a unique landing page that explains the offer, whether it's for a limited time or a limited number of seats. Include the terms and conditions of the offer and integrate the correct booking button so that customers can directly book a tour without leaving the page. (If the offer only applies to specific activities, you could create a collection of those activities and use the Activity Collection integration to display the right tours on the page. If the offer applies to all activities, use the Activity Finder integration.)
  • Pop-ups—Consider adding a simple pop-up to your popular pages to draw attention to your campaign. Some tools I recommend include MailChimp, MailerLite and OptinMonster.
Newsletter or mailing list

Create a simple email campaign and send the offer to your existing mailing list.

Here's what to do:

  • Introduction — This is a simple email that highlights your latest offer with only the relevant information (e.g. valid activities, how long the offer lasts for, what the offer is all about). Remember to include any discount codes and a link to your unique landing page so that people can learn more and book a tour immediately.
  • Reminder — A day or two after you've sent out the introduction to your offer, consider sending your readers a gentle reminder. This will include a summary of your offer, a summary of the terms of the offer, and a link to the booking page.
  • Last call — Send this email on the last day or the day before the last day of your campaign. Subject lines like “24 hours left” can be a great way to draw the attention of your users.

Read more: 3 email marketing tips to grow your tour and activity business

Social media

Another way to drum up excitement is through your social media channels.

Here's what to do:

  • Posting schedule - Consider posting about your offer a week before launch, and another two or three times during the campaign. However, bear in mind that your posting schedule depends on the duration of your campaign.
  • Visuals - With social media, you can play around with videos and pictures. For a quick and easy way to create captivating images, you can use a tool like Canva that comes with plenty of templates for different use cases. (By the way, Canva also offers a social media scheduling tool which can simplify how you execute your social media strategy.)
  • Post captions- Similar to your emails, highlight what the offer is and your terms and conditions and a link to your unique landing page. For Instagram, I recommend using a tool like Linktree to add a link to your website and another link to your unique landing page from your profile.
  • Channels - To get the best results from social media, focus on two to three channels only. The channels you choose should be where your target customers are and allow you to be discovered by other users without having to constantly pay for ads.
Social media advertising

Advertising through social media can also be an effective way to reach your intended audience. Facebook (and by extension Instagram) offers highly targeted tools that allow you to reach the people you want based on their interest and location.

To learn how to set up your first paid Facebook or Instagram ad, download Chris Torres' free e-book, Lookers into Bookers, and jump to Workshop Thirty on page 299. He offers a thorough overview of the different campaigns available and how to set up your first ad.


Partners

I'm sure you have many partners in your local network, whether these might be hotels, restaurants, rental companies and other complimentary businesses in your destination. Consider reaching out to businesses to market to a similar audience as you do and ask them if they'd be open to promoting your offer on their social channels, website, or newsletter.

To make it as easy as possible for your partners to help you out, include the caption, visuals and relevant links in your email to them.

Other things to consider

Before going live, here are a few more things to consider.

  • Cancellation and refunds policies for discounted offers — Make sure that your refund and cancellation policies are crystal clear.
  • Clear messaging — Your offer should be mentioned throughout your website, social media channels and any digital touchpoints you might have.
  • Measures of success — What would a successful campaign look like? Say you've spent €300 on digital advertising and an additional week to put together this campaign. What's the total value of bookings you need to achieve to cover the time and resources you've invested?
  • Tracking and analytics — Apart from booking data, how else will you gather data to check if your promotional strategies worked? Drawing on tools like Google Analytics can be a great way to track website performance and identify areas for improvement for future campaigns.

Tip 5: Expand your distribution channels

We've reached Week 5! This week, we'll learn how you can expand your distribution by working with the right OTAs, and what you can do to get your content listed on their sites.

Before we jump into action, should operators work with OTAs?

Short answer: Yes.

However, you should notonly work with OTAs and they cannotbe your only source for new customers. Here are some pros and cons of working with OTAs.

Note: This is a summary of an article published on our blog.

Benefits of working with OTAs for distribution

1. Exposure to key markets

The right resellers should get you closer to your target customers or even help penetrate new markets. Therefore, the OTAs you choose to work with should depend on the customers you're trying to reach.

For instance, you could partner with market-specific OTAs to gain exposure to a specific consumer, for example listing your tours on Klook to reach the Asian market, or sell your tours on niche reseller sites like TrekHunt that specifically target outdoor adventure enthusiasts.

2. Potential for more business

Forward thinking operators to use resellers to gain new customers and systematically follow-up on OTA bookings to upsell customers, or stay in touch with them after the tour to encourage repeat bookings.

The caveat here is that you need to already have a clear marketing strategy and working with OTAs is not your only strategy, but part of youroverallstrategy.


3.Value-added services

Given that OTAs only make money when you get a booking, it is in their interest for your products to perform well on their site. With this in mind, consider getting in touch with your account manager to ask for advice on how to optimise your listing.

More niche marketplaces likeSwiss Activities do not only help operators optimise their listings by rewriting product content where necessary, they also ensure that product content is translated into German, Italian, French, and English to meet the needs of their target audience. Klook and Musement also offer this service and you can use the translated content on other sales channels too.

4. TrekkConnect makes it really easy to share your inventory with resellers

TrekkConnect, our channel manager, makes it easier for you to connect with OTAs, upload tour prices, schedules and content, and manage bookings and cancellations from these channels.

With TrekkConnect, you can share your inventory with a new marketplace in just a matter of minutes.

Drawbacks of working with OTAs

1. You risk becoming dependent on external parties for new bookings

It isn't uncommon for companies to suffer a dip in bookings when the OTA decides to change their algorithm. There was also evidence, for a while, that suppliers using Bokun (a booking system acquired by TripAdvisor back in 2018) had received preferential treatment by having their products appearing first.

This highlights that operators should not put all their eggs in one basket and rely solely on one or two channels to bring in bookings, especially for sales channels they do not own.

2. Not all resellers want to work with you

The reason is simple: resellers do not want to work with products that don't sell.

To avoid this, you need to do your research. Find out who your resellers sell to and what their customers want. If there is alignment between their target market and your target market, then it is worth looking into tweaking your products to suit their marketplace requirements. (We've got more tips for you below!)

Striking the right distribution balance

Commission rates were eating into profit margins

Prior to the pandemic, we saw OTA commissions starting to mirrorthe hospitality sector, where rates were hitting 40% to 45% per hotel booking. Popular sites like Viator and GetYourGuide were charging commissions of 20% to 30% per booking, leaving operators wondering if they should take on the direct marketing and customer acquisition costs themselves.

On top of that, we also saw that most OTAs required operators to list their "best price" (aka the lowest price) on the reseller's site, offering no incentive for customers to book directly with the operator, where customer acquisition costscouldbe lower.

Here are some other factors to consider when figuring out how to balance your distribution:

  • How does this partnership impact customer acquisition costs? Is it better to pay the OTA to do the marketing for you? Or are you better off going at it on your own?
  • What customer segment does this OTA bring in? Are they reaching a segment you can reach on your own?
  • For customers that book via OTAs, do you have systems in place to upsell them or encourage repeat bookings?
  • Can you really afford the "best price" guarantee?
  • What proportion (%) of your availability will you offer this OTA instead of another? What about the proportion offered to your other sales channels? How will this distribution mix impact overall cashflow?
Alternative distribution channels to consider

Apart from OTAs and your own website, there are plenty of other ways to distribute your products that might get you more bang for your buck.

Here's a list of potential distribution partners you could work with and offer them a commission in exchange for a booking:

Learn more by catching the replay of "Building long-term and profitable partnerships with travel partners"with Outdoor Interlaken's co-founder Jon Fauver. (I highly recommend this webinar.)

How to create content that gets you listed on OTAs

If you have decided to work with OTAs, here are exlclusivetips to optimise your product content from Peter Conway, former Managing Director of ExperienceBank, a channel manager platform. You can find the original article here.

What is product content?

Content refers to the the pictures, videos and written copy that shared with distribution partners such as OTAs, other tour operators, travel agents, hotels, hostels and so on.

While the vast majority of operators are really good at telling their stories and keeping their audiences engaged when they are in front of them, when it comes to describing their experience in words or getting the right images to share, many operators do not invest in this area.

By failing to create high quality descriptions of your service, you are simply turning people away from your website or making it difficult for partners to list your service, effectively saying goodbye to revenue.

What does good content look like? This is a question we get asked regularly so we went out and spoke to various OTAs to get their input.

We collected their feedback to create this cheatsheet for you:

Your ultimate OTA content cheatsheet

Images and videos
  • Long vs Tall Images:Most OTAs have their images in a landscape format on their websites (aka length ways), however lots of operators continue to send portrait images (aka tall images). Next time, make sure to take more photos in landscape so you have a good selection of photos to pick from.
  • You should have atleast 12 high quality images to share with distributors (6 landscape and 6 portrait). By providing both formats (landscape for desktops and portrait images for mobile), you save the OTA lots of time and improve your chance of getting listed.

Here are some tips to help you source high quality images:

  • If you do not have a good photographer on your team, pay a professional to get you the images you need. It will be something that will pay you back a hundred times.
  • Make sure they give you the images in both a high resolution print format and a low resolution web format.
  • If you have the budget, get them to cut you a 60 second intro video to show potential customers what to expect when they book your product.

Tour and activity descriptions
  • Product Description: Describe your offer in 250 to 500 words. Be sure to address what makes you special and why visitors should not miss your offering.
  • Localise Content: Have your content description translated to different languages. If your target audience are German travellers, then you should have German content on your site, and also provide German content OTAs who also target German-speaking travellers.
  • Languages: Clearly state what languages you deliver your tour in.
  • Unique selling points (USPs): Highlight your 4 to 5 USPs (also refer to the Value Proposition you worked on in Week 2)
  • Inclusions: List what is included and what's not included in the tour price.
Logistics
  • Address/Pick up: Include GPS coordinates along with address of the venue/starting point/pick up location of your tour.
  • Directions: While this might not be so much of a problem if you operate in urban areas, if you operate in rural areas, make sure to give customers clear directions to the starting point.
  • Start/Open times: Clearly state your opening times and include the last tour time, or latest time to best explore an attraction or museum.
  • Additional Information: What extra information would be useful for guests to know? Examples include “Wear good walking shoes” or “If attending in the afternoon, leave extra time to get here due to traffic”. For certain activities, you might also mention height and/or weight restrictions.
How do I improve my chances of establishing a successful OTA partnership?

The following operational features should also be considered to improve your chances of getting listed and growing third party sales:

  • Live availability via API: OTAs want to instantly confirm bookings, either via your booking system or a standalone channel manager.
  • Mobile friendly vouchers: Most customers travel with their smartphone and that's how they're likely to check-in.
  • Listing availability for up to 2 years: For that special trip, customers are likely to book a lot more in advance.
  • The later the cut off the better: Later cut offs drive sales – especially last-minute sales on mobile devices.
  • Consider the different languages in which your tour/product is available: Not every visitor speaks your home language, but nearly every visitor is a potential customer.
  • Clear and unambiguous cancellation policy: Be upfront and concise. Make it easy to do business with you. Due to pandemic, flexibility is critical to secure bookings.
  • If you take reviews on your site – share them: Potential customers want to know what previous customers thought about your trip. With negative reviews, reply to them sincerely and learn from them.

Check out these articles to learn more and get started:

Two ways to get the help you need

1. Check out our Help Center

We've been consistently updating and adding new articles to the Help Center. Feel free to check it out here


2. Reach out to the Support Team via Chat or Email

To reach out Support Team, you can start a chat with them from the Dashboard or email them at support@trekksoft.com